Finux User Guide
Table of Contents
- Introduction
- Quick Start
2.1 Understanding the guide
2.2 Explanation for Command formats
2.3 Explanation for Date and Date formats
2.4 Explanation for Expense, Loan, and Saving output formats - Features
3.1 Add a record:add
3.1.1 Add an expense record
3.1.2 Add an loan record
3.1.3 Add an saving record
3.2 List the records details:list
3.2.1 List all expense records
3.2.2 List all loan records
3.2.3 List all saving records
3.2.4 List all records
3.3 View category total amount:view
3.3.1 View total expenses
3.3.2 View total unreturned loans
3.3.3 View total savings
3.3.4 View total amount in every category
3.4 Mark a loan as return:return
3.5 Remove a record:remove
3.6 Check a person’s credit score:creditscore
3.7 Exit the program:exit
3.8 Help function:help
3.9 Records Storage
3.9.1 Saving Data
3.9.2 Loading Data - Frequently Asked Questions
- Command Summary
1. Introduction
Finux is a Command-Line Interface (CLI) application that allows you to record your expenses, savings and loans all in one consolidated platform. With these information made readily available at your fingertips, it will allow you to better adjust your expenditure or work harder towards your savings goal. Finux also includes a way for you to keep track of the loans you have made to your friends, or the tabs for the dinners you have paid for first.
As the Finux application is inspired entirely by the *Nix operating systems, and if you are familiar with the CLI command interface, you will definitely enjoy the benefits of the application. You will also be able to speed up your financial management and planning with the Finux application as compared to the traditional finance management applications in the market.
2. Quick Start
- Ensure you have Java
11or above installed in your Computer. - Download the latest
finux.jarfrom here. - Copy the
finux.jarfile to the folder you want to use as the home folder of Finux. - For Windows users, pull up your Command Prompt.
For Mac users, pull up your Terminal.
Navigate to the directory containing thefinux.jarfile.
i.e.cd FILEPATH,FILEPATHis the absolute address to the home folder of Finux. - Run the
finux.jarfile by executing the commandjava -jar finux.jar.
2.1 Understanding the guide
Now that you are here, congratulations on taking the first step to embark on your finance management journey! But before you proceed, there are a few tips and tricks that you should know in order to better understand our guide.
Throughout the guide, you will come across various symbols, each has a different meaning:
💡: The light bulb will precede information that may be important when using the app.
❗: The exclamation will precede warnings for commands and inputs that may hinder your use of the app.
📝: The notepad will precede information that may improve the flexibility of using the app.
2.2 Explanation for Command formats
There are the argument types and notation used in Finux:
CMD- a valid command.-OPT- an option, a letter preceded by a dash. E.g.-i.<FIELD>- an area where data is required.
The Commands in Finux follow these argument orders (depending on the command):
CMD -OPT <FIELD>CMD -OPT <FIELD> -OPT <FIELD> ...CMD <FIELD>CMD
❗ Commands and options are case-sensitive
- E.g.
exitwill work, whereasExit,EXITor other variations will not be recognised.- E.g.
view -swill work, but using-Swill not be recognised as a valid option.
❗ All options are single letter and followed by 1 space at the front and back
- E.g.
_-a_would be a valid option format after replacing_with space at the front and back.- E.g.
add -e Plain bread loaf -a 10will work, whereasadd -e Plain bread loaf -a10will not be recognized as valid because the input have a missing space in between-aand10.
2.3 Explanation for Date and Date formats
Date input is required when you specify the option -d.
You are required to enter a date that follows a valid date format.
Finux supports multiple date formats for ease of use such as the one listed below:
DDMMYYYYD.M.YYYYD-M-YYYYD/M/YYYYYYYY.M.DYYYY-M-DYYYY/M/D📝
todaykeyword specifies today’s date, replacing the need for you to type in the actual date for date inputs.
2.4 Explanation for Expense, Loan, and Saving record output formats
The general output format used by Finux in displaying an expense and saving record is:
[record_id] [record_type] [issue_date] [amount] description
Whereas the general output format for loan record is:
[record_id] [record_type] [issue_date] [amount] description [return_status]
- record_id
- record ID used to identify the record shown in the application
- record_type
- A single character denoting the type of the record.
Efor expense record,Lfor loan record andSfor saving record.- issue_date
- Date of record supplied by the user.
- description
- Description of the record supplied by the user.
- return_status
- This field is only applicable to loan records.
- A character denoting the return status of the loan record.
[v]for returned loan record and[ ](an empty space) for unreturned loan record.
For example, lets say you bought a plain loaf of bread for $2.75 on 3rd March 2021. The output format of this expense record will be:
[ID: 1] [E] [2021-03-03] [$2.75] Plain bread loaf
Suppose you now make a loan of $500 to Mark on 20th March 2021 with the description being set to 1st loan to Mark, then the output format of this unreturned loan record will be:
[ID: 2] [L] [2021-03-20] [$500] 1st loan to Mark [ ]
After Mark return this loan to you, the output format of this returned loan record will be:
[ID: 2] [L] [2021-03-20] [$500] 1st loan to Mark [v]
For the add and list commands, each displayed record will be preceded with a number, referred to as the record ID of
the record with respect to the combined list of expense, loan, and saving records. Let’s say you have added the records
shown above to Finux one after another, then doing a list -l operation will display the above loan record to you as
follows:
[ID: 2] [L] [2021-03-20] [$500] 1st loan to Mark [v]
This means that the $500 loan you have made to Mark on 20th March 2021 has been returned and this loan is the second record added to Finux.
3. Features
3.1 Add a record: add
📝 For the
addcommand, there is no strict ordering for options.
i.e. option-acan come before/after option-d.
3.1.1 Add an expense record
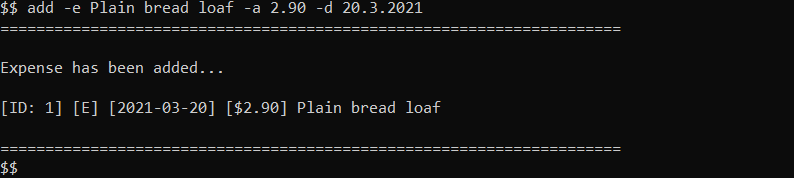
Suppose you bought a plain loaf of bread for $2.90 on 20th March 2021, you would want to enter
your expense as the example shown below.
Format: add -e <description> -a <amount> -d <date>
Example: add -e Plain bread loaf -a 2.90 -d 20.3.2021
Output:
3.1.2 Add a loan record
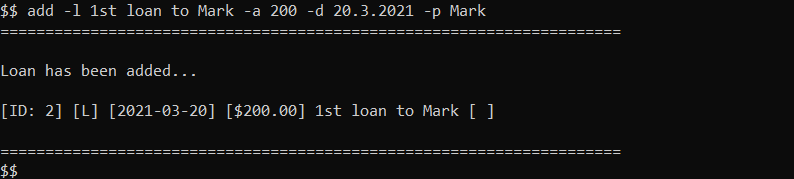
It is the 20th of March 2021, and your friend Mark borrows a large sum of $200 from you. You will
have to enter the following into Finux to record this loan.
You may want to add a description of the loan, in this scenario, it will be 1st loan to Mark
and to include his name as to keep track of Mark’s loan.
Format: add -l <description> -a <amount> -d <date> -p <person>
Example: add -l 1st loan to Mark -a 200 -d 20.3.2021 -p Mark
Output:
3.1.3 Add a saving record
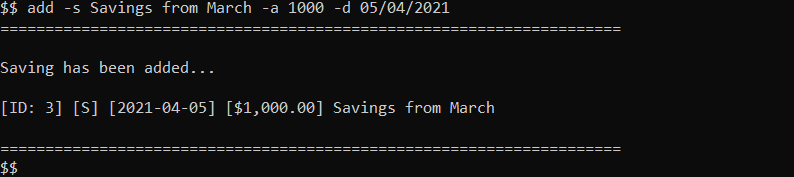
Lastly, you may have saved a sum of money over the past month of March and you recorded your saving
on the 5th of April.
Format: add -s <description> -a <amount> -d <date>
Example: add -s Savings from March -a 1000 -d 05/04/2021
Output:
💡 Do note that for an
expense, you will have to use-eas the option. This follows forloanwith-landsavingwith-s.
3.2 List the records details: list
3.2.1 List all expense records
You may want to list all your saved expense records in Finux. By entering the list command
along with the expense option -e, Finux will display all your saved expenses.
Format: list -e
Output:

3.2.2 List all loan records
Likewise with listing your saved expenses, Finux is also able to list all saved loans. You will have
to use the loan option -l in this scenario.
Format: list -l
Output:

3.2.3 List all saving records
Furthermore, all your saved savings can also be listed with the saving option -s.
Format: list -s
Output:

3.2.4 List all records
Lastly, you can list all of your records with the all option -a.
Format: list -a
Output:

3.3 View category total amount: view
3.3.1 View total expenses
At this point, you may also want to view your total expenses incurred till now.
So instead of listing as explained above, you would have to use the view command instead.
Format: view -e
Output:

3.3.2 View total unreturned loans
You can also view your total unreturned loan using view and the option -l.
📝 The total amount shown only includes the unreturned loans.
Format: view -l
Output:

3.3.3 View total savings
Your total savings can also be calculated using view and the option -s.
Format: view -s
Output:

3.3.4 View total amount in every category
To see the amount of each category (expense, loan and saving) in a summarized format,
you can use view and the option -a.
Format: view -a
Output:

3.4 Mark a loan as returned: return
📝 For the
returncommand, there is no strict ordering for options.
i.e. option-dcan come before/after option-i.
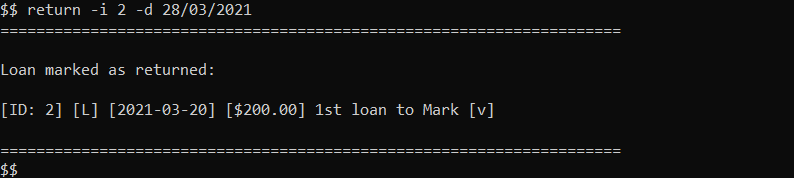
Let’s say Mark returns the loan he borrowed on 20th March 2021, and his loan record is the second record in the
combined list of expense, loan and saving records.
Then to mark this loan as returned, the record_id to be included in this case is 2 and the return_date is
the date of return which is 28/03/21.
Format: return -i <record_id> -d <return_date>
<record_id>refers to the record_ID displayed in the list command output.<return_date>refers to the date on which the borrower has returned the loan.
Example: return -i 2 -d 28/03/2021
Output:
3.5 Remove a record: remove
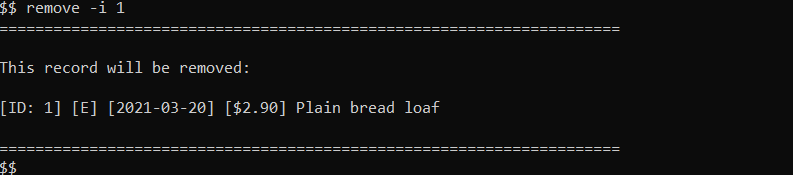
In a scenario that you realised that the expense record of Plain bread loaf added on 20th March 2021 was wrong,
you can remove the record by entering the remove command with the record ID of the expense,
this is case, it would be 1.
Format: remove -i <record_id>
<record_id>refer to the record ID displayed in list command.
Example: remove -i 1
Output:
💡 To find the record ID of a record, you can simply
listthe record type (-e,-l,-s,-a) and the number that precedes the record is the record ID.💡 After removing a record from the application, you will have to use the list command again to retrieve the latest updated record IDs.
3.6 Check a person’s credit score: creditscore
Let’s say that Mark wants to borrow money from you again, but you will want to know his “credit-worthiness”
before lending him money again, you can simply enter his name after the creditScore command.
Format: creditscore <person>
<person>refers to any person including those in the list and not in the list.<person>is case-insensitive, e.g.jasonis the same asJason
Example: creditscore mark
Output:

📝 As of version 2.1, a score of
5will be added if returned within a week,10,20and50will be deducted when a loan is returned after one week and before the second week, two weeks and before the fourth week and after four weeks respectively.
💡 A credit score of
100will be shown from a person who has not borrowed money from you as they can still considered trustworthy. The Finux application will display a credit score of100for people whom you have not added any loans prior.
3.7 Exit the program: exit
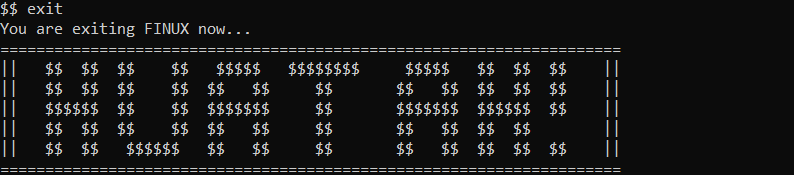
You can exit the application by typing the exit command.
Format: exit
Output:
3.8 Help function: help
To see the available commands and their usage, simply type help all and a brief description of the commands will
be shown.
Format: help all
Output:
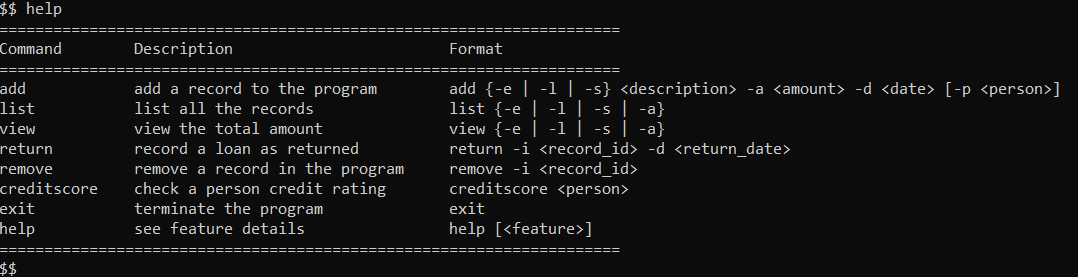
📝 Typing help is also equivalent to typing help all.
If you would like to know the specifications in details, simply type
help followed by the feature name from the available list below:
add: display the help section foraddcommand.list: display the help section forlistcommand.view: display the help section forviewcommand.return: display the help section forreturncommand.remove: display the help section forremovecommand.creditscore: display the help section forcreditscorecommand.exit: display the help section forexitcommand.
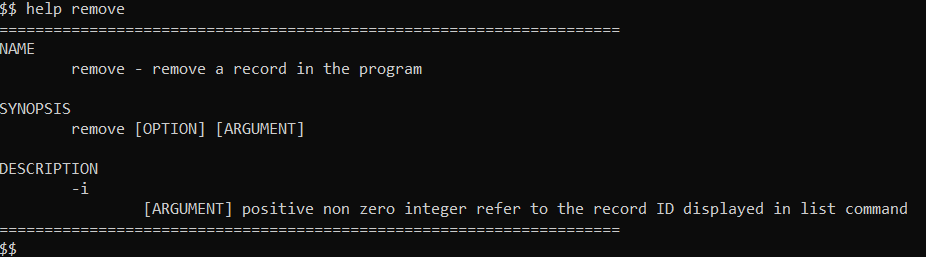
Each help section is divided into three parts:
NAMEwill show you the feature name and its brief description.SYNOPSISwill show you the whether an option or argument is needed.DESCRIPTIONwill explain the usage of any options or arguments.- 📝 The
exitsection will only show theNAMEandSYNOPSISas no argument is needed.
Format: help <FEATURE>
Example: help remove
Output:
3.9 Records storage
3.9.1 Saving Data
- All your records are automatically saved into
finux.txtafter the following commands:add,remove,return. - Records will NOT be saved after the following commands:
help,list,view,creditscore,exit.
❗ Do ensure that permissions are given for Finux to write into the folder it is in, Finux will exit upon unsuccessful file creation.
3.9.2 Loading Data
-
Finux will automatically load your data from
finux.txtwhen it finds the text file in the same home folder as mentioned in the Quick Start. -
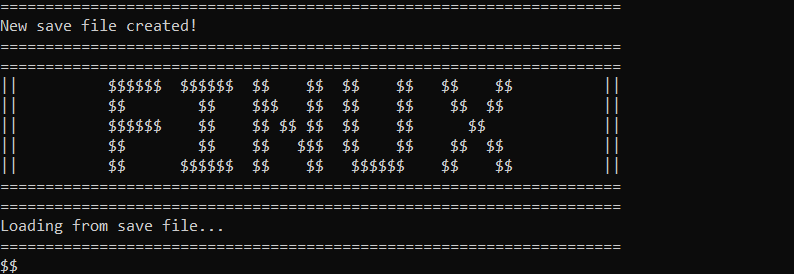
Expected output for new file creation:
-
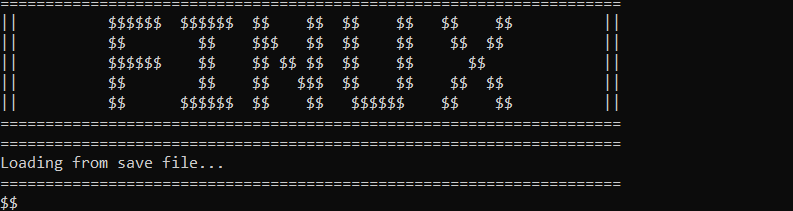
Expected output if successful load:
-
Expected output if not successfully loaded:

❗ Do NOT modify the contents of the
finux.txtsave file.
4. Frequently Asked Questions
Q1: How can I transfer my saved tasks information to another computer?
Run Finux on the other computer and overwrite the empty
finux.txtcreated, with thefinux.txtthat contains the data of your previous Finux usage.
Q2: Does the view -l shows the total loan amount?
No.
view -lonly shows the total amount of unreturned loans.
Q3: What happens if Finux crashes unexpectedly?
All records are saved upon addition, deletion, or returned. Hence chances of data losses are minimized.
Q4: Finux keeps having a bad init error message, but it is my first time launching Finux.
Do check and ensure that Finux has the proper write permissions in the directory.
5. Command Summary
| Feature | Command | Example |
|---|---|---|
| Add an expense record | add -e <description> -a <amount> -d <date> |
add -e Plain bread loaf -a 2.90 -d 20.3.2021 |
| Add a loan record | add -l <description> -a <amount> -d <date> -p <person> |
add -l 1st loan to Mark -a 200 -d 20.3.2021 -p Mark |
| Add a saving record | add -s <description> -a <amount> -d <date> |
add -s Savings from March -a 1000 -d 05/04/2021 |
| List all expense records | list -e |
- |
| List all loan records | list -l |
- |
| List all saving records | list -s |
- |
| List all records | list -a |
- |
| View total expense | view -e |
- |
| View total unreturned loans | view -l |
- |
| View total savings | view -s |
- |
| View total amount in every category | view -a |
- |
| Mark a loan as returned | return -i <record_id> -d <return_date> |
return -i 2 -d 28/03/2021 |
| Remove a record (expense/savings/loan) | remove -i <record_id> |
remove -i 1 |
| Check a person’s credit score | creditscore <person> |
creditscore mark |
| Exit the application | exit |
- |
| Help (detailed) | help <feature> |
help remove |
| Help (brief) | help |
- |
By: Jonah Tham, Gerard Tan, Lee Han Yong Andy, Mark Low, Tan Tze Xern
Updated: April 2021